26 November, 2021

Christmas countdown

I'm a bit late to post today, so I better come straight to the point. 
I've been invited to prepare a GD project over at Scrapping4 Fun for the current "winter/Christmas" challenge, and this is what I came up with:
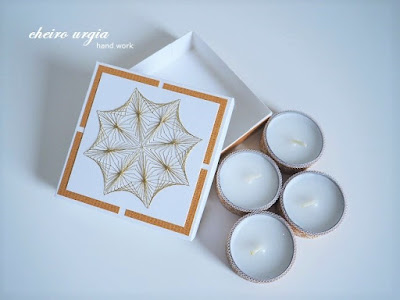
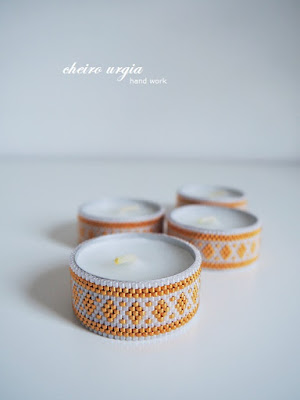
The arrangement of 4 golden candles is self-explanatory: I decided to create an Advent wreath, albeit I've chosen a bit of an un-traditional layout. I beaded four strips of a white and gold zig zag using delica beads from my stash. I sewed the ends together in a manner that allows to change the tea candles for the simple reason that I didn't want all the effort go to waste after a single use. 
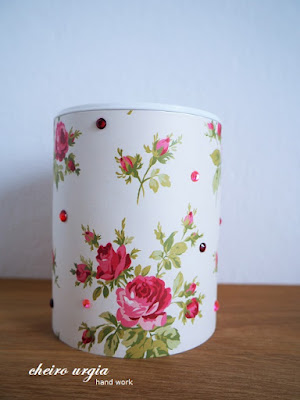
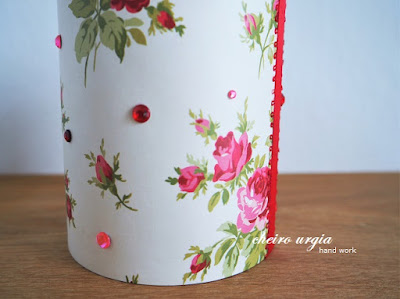
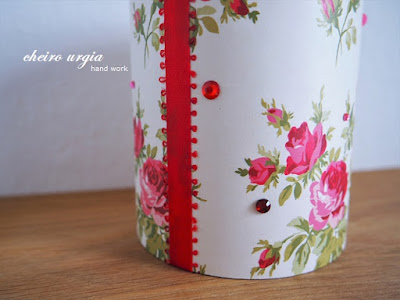
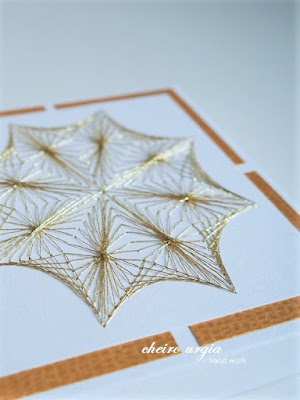
For the packaging, I was torn between a 2x2 rectangle or a box that would have the candles lined up in a row. As you see, I opted for a rectangular shape in the end - mostly as it would allow me to embellish the box with a stitched star. 
I created the box using scraps of white cardboard and tried to make it as fitting as possible in order to prevent the candles from drifting during transport. Once that was done, I used golden scraps to create a transition between the inside and the outside of the box: I placed stripes of golden paper around the box itself, while I wanted to decorate the lid with a layer of golden background paper.
Since the paper piece was the only one left and it was too small to go from side to side, I decided to improvise by cutting it into four smaller pieces. This way, it would still be visible from behind the star, while the empty space in the middle would be covered up by the golden star.
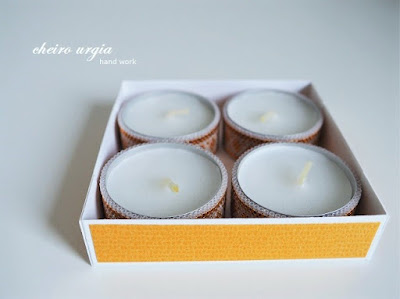
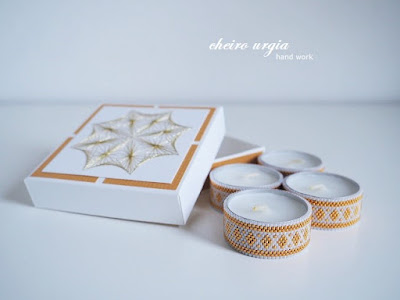
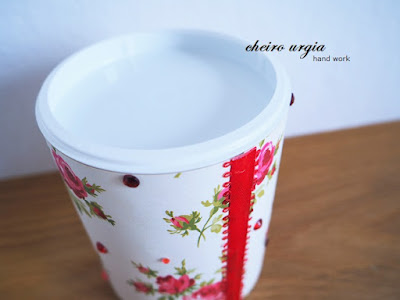
When everything is packed up, my Advent wreath can be easily transported or even sent by mail due to its small size and weight. Once the candles are taken out of the box, their ornaments can be seen as well. I've been lucky to realize that the pattern fits exactly around the candles without creating awkward gaps, which is a complete coincidence. In a very practical way, the candles can be arranged as pleased without the fear of setting an actual wreath on fire or needing to constantly swipe away the needles that fall off.  
Unlike my usual crafting projects which I create for fun mostly and hide in my stash until further use, this one has already found a new home at my aunt's place. It was a bit of an intentional project to create, since I'm staying with her for a couple of days and she'd usually refuse any payback for her hospitality. That being said, it's an easy one to bring a hand-made "Thank you" in exchange for a place to crash, especially since she's a crafty person herself with all kinds of decorations inside and outside of her house. 

challenges:  
krafty chicks: all occasions
613 avenue create: ATG with optional twist "thankful" 
a bit more time to craft: ATG
basteltraum: gifts/recipes
C.R.A.F.T.: winter
crafters castle: ATG
crafty calendar: ATG
crafty catz: ATG
crafty gals corner: thank you/thankful
crafty sentiments: ATG
craftyhazelnutschristmaschallenge: ATG as long as it's Christmas
creative inspirations: wonderful winter/feeling festive
creative moments: ATG
intaas: winter
love to craft: ATG 
make my monday: cute Christmas
moving along with the times: ATG but a card
my time to craft: stitching real or faux
path of positivity: be grateful
pennys papertake: ATG

19 November, 2021

Quadruple

We're starting a new contest over at the Alphabet challenge, and I think we all agree that the tasks become quite tricky at the end of the alphabet. No need to worry as there's an easy one for Q. It's "quadruple", meaning we'd like to see four of something on your creation. 
I've had quite a few ideas on my mind for my DT inspiration, but I opted for an easy winter/Christmas card in the end. 
The wonderful smile on the photo is from a fashion magazine. I've cut it out a while ago, thinking it might come handy in some of my future projects. On my card, I combined it with a bunch of papers: the brown one with scriptures is from a set of Christmas sheets, the embossed swirls are leftovers from ages ago. From the Christmas set I also took the festive sentiment. However, I decided to remove the green border it used to have and replace it with a scrap piece of brown cardboard. To frame the smile, I picked a dark green paper with polka dots, but my placing of the image turned out to cover the dots on the right side. I'm not sure what to think about it, I cdertainly wish I had those dots all the way around the image. On the other hand, maybe the asymmetry isn't that bad after all?
For the quadruple theme, I punched four snowflakes: I placed the big one on the left side of my card, while the three smaller ones form a group on the right. I decorated each snowflake with a light brown pearl to make it pop, but I see that the smaller ones don't really stand out against the white background.
As this is one of my first festive cards this year, I thought I'd present it in a proper way. I wanted to go to the flower market and see whether they already have some fir branches, and planned to create a layer of green to place my card on. However, I wasn't in the mood to go out into the cold fog, so my new hoya had to step in for the greenery :)

challenges:
creative inspirations: wonderful winter/feeling festive
creative moments: ATG
cutie pie challengeblog: ATG cute
day of the month: beautiful day
do-all kreatives: embossing & frosty times
love to craft: ATG 
morgans artworld: ATG
my time to craft: texture
path of positivity: be grateful
pennys papertake: ATG

05 November, 2021

Patterned paper

Just a quick post from me today as we're starting a new challenge over at the Alphabet challenge blog. We'd like to see "Patterned papers" this fortnight, meaning you can enter any kind of creations again, on the condition that they include some paper fun. 
I went very easy on that one by simply covering an old box of cereal toppings with a lovely rose-patterned paper. I wnated to use this one for quite some time, but I didnt want to use it on a card because I usually tend to cover up the majority of papers I use in card projects. And since I created quite a few cards lately, it had to wait in my paper stash for a non-card project. 
The process of crafting was rather simple: I cut the paper to size and made sure I placed it around the paper box without any major tears and wrinkles. To make sure there's a nice transition where the paper ends meet, I placed a red ribbon over the paper edge. 
For a bit of bling, I used gemstones in different shades of pink. I think they give a bit of bling to the project, and they're also great when it comes to filling the space between the rose buds. 
The box itself is on my kitchen shelf for the moment, filled with leftover cereals. I think I'll eventually use it for cookies, and as such, it might as well become a gift box filled with yummi treats. 

challenges: 
as you like it: favourite circle embellishment (It's definitely gemstones and/or pearls for me, as I can't seem to finish a crafting project without them. I like to add a bit of bling to my creations, and I think those little embellishments are a perfect way to enhance the main motif without taking the attention away from it.)
C.R.A.F.T.: gift bag/box
creative crafty uncles: males go feminine - breast cancer awareness
love to craft: ATG