31 December, 2021

Trees

Today, I'll make it short and present a rather simple card for our newest challenge over at the Alphabet blog. We're having a "Trees" theme this fortnight, and my DT work is a last-minute creation I created Wednesday evening to replace another project of mine. It did feature trees, but I wanted to make the challenge theme more obvious, so here we go.
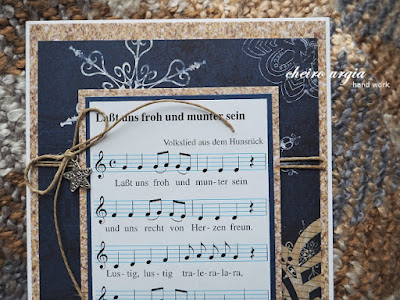
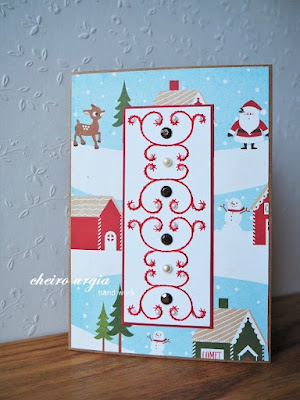
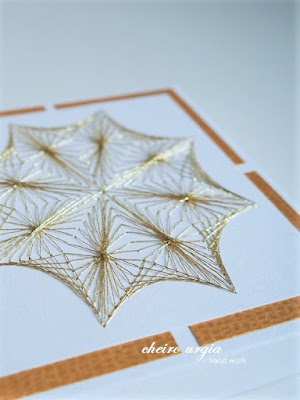
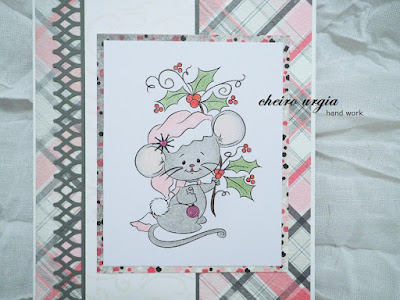
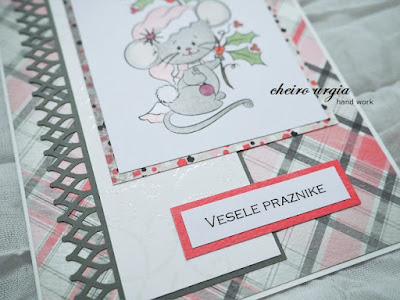
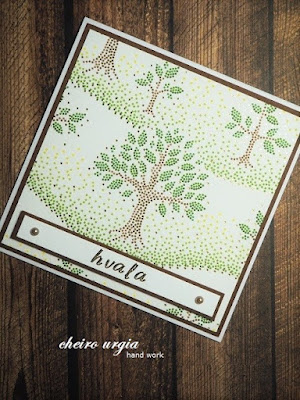
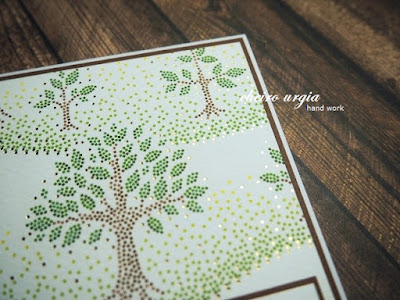
First things first, I absolutely love the patterned paper. I can't believe I didn't buy a whole bunch of those sheets when I saw them, as they're beyond beautiful to me: full of dotted hillsides with trees of different sizes, and I think the dots are what makes the scenery so special. Next to the obvious brown and green ones, there are golden accents as well, which gives the paper a fun, elegant glow. Due to bad lighting the card doesn't look exactly like it does in reality where it's a bit brighter and warmer, but there's nothing I can do about the lack of sunshine.
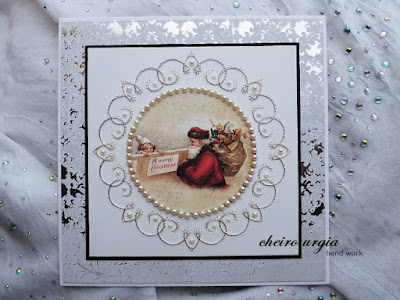
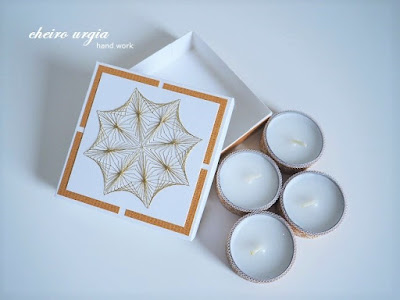
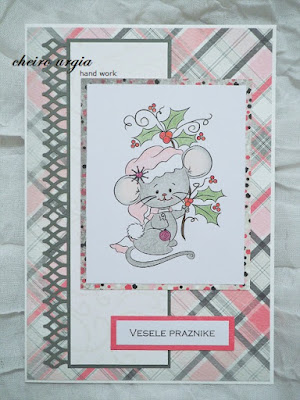
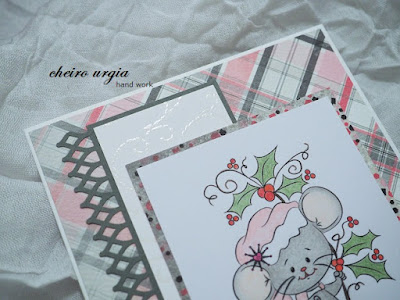
Knowing I would like to show as much of the paper as possible, I decided to use the pattern as my centerpiece. I took one of these tiny card bases, and placed the scenery on an additional piece of brown card board. Since I didn't want the card to look all too empty, I then cut a tiny strip of brown and white paper, which I placed onto the card by using 3D adhesive pads. My idea was to create a little something that would enrich the card without taking away from the those beautiful trees, and I hope it worked out as planned. 
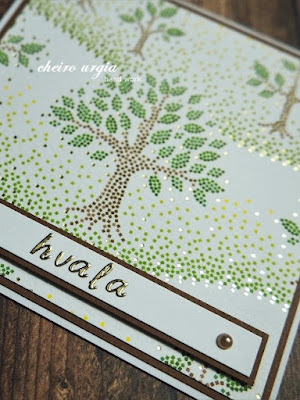
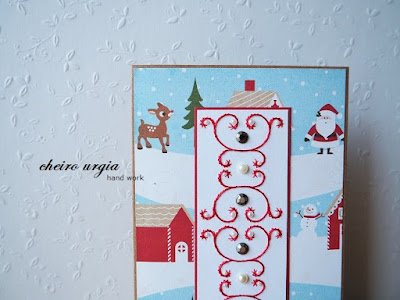
Since I didn't want to run the printer for a sentiment, I decided to create it by using the smallest font of golden stickers I had in my stash. I created a simple "Thank you" (no idea why the "L" is made to stand out like this), and lined it with two tiny brown pearls. 
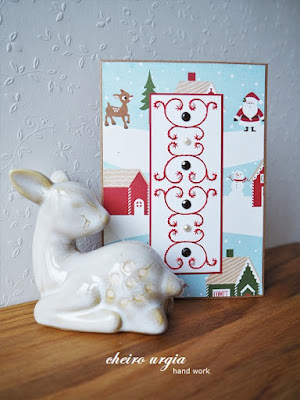
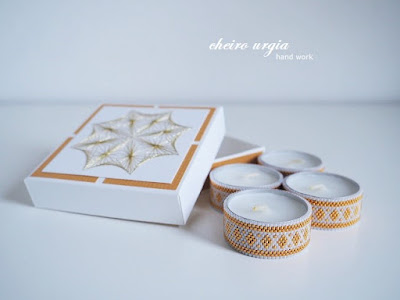
I'm not sure where the card will end up, but I can imagine adding it to chocolate bar, or a box of pralines, or even a potted plant to give to someone in gratitude. 

challenges:  

17 December, 2021

Silver

I'm late with my DT project for the Alphabet challenge, so I'll come straight to the point. Our theme this fortnight is "Silver", meaning we'd like to see shimmer and bling on your entries. 
Since I was having time issues, I decided to recycle an old Halloween card. There was nothing wrong with it as such, but I don't really make spooky cards nor do I have use for them. I created this one to feature this super cute image, and that was that. Since I didn't want the card to go to waste, I removed the Halloween scene a while ago. The centerless card landed on my pile of to-be-finished products, but I never had a break-through idea on what to do with it. 
As seen in the pictures, the card is build around a swirly circle which I stitched with silver yarn. Once the sewing was done, I decorated it with tiny white pearls. To match the silver swirls, I used a background paper from one of my Christmas collections. Since the card was originally made as a Halloween project, I added a black cardboard to enhance the stitched pattern, and I think that was the part that bothered me most every time I tried to re-use the card base. With the addition of black, I contemplated creating a sympathy card, but I couldn't come up with anything that would fit in the rather small circle. 
In the end, I fussy cut a Christmas scene. In a fun coincidence, the image fits almost perfectly into the stitched border. I palced it directly on the card and enhanced it with a strip of white pearls, making it look like a Christmas ornament. 
Matching the swirls on my card: swirly decorations around Ljubljana
challenges: 
613 avenue create: ATG with optional twist "any holiday" 
a bit more time to craft: ATG
C.R.A.F.T.: Christmas
craft-alnica: ATG festive
creative crafty uncles: Christmas/Happy new year
creative inspirations: Christmas time
creative moments: ATG
everybody art: Christmas
friendship challenge: Christmas
little red wagon: Christmas
love to craft: ATG 
morgans artworld: ATG
pennys papertake: ATG
scrapping4fun: Christmas/winter
sparklesmonthlychallenges: vintage Christmas
12 months of Christmas: optional theme "ATG Christmas"
vesela hiska: gold & silver as sparkle

06 December, 2021

Moody Christmas

It's a rather unplanned post from me today, but I've created a rather unplanned card that I'd like to show you. Its main motif is a traditional St. Nicholas song, which I found in an old book of Christmas customs. 
The little musical sheet seemed perfect to be featured in one of my crafting projects, so I cut it out and glued it onto dark blue card board. Then, I began to look for matching papers in my stash. I soon found a dark blue paper with snowflakes and stars, but the piece was a bit too small to place onto a white card base. I began searching for a brown paper that would match the huge snowflake in the lower corner, with no avail - all the browns I could find were either too ocher or too chocolaty.
I extended my search beyond monochrome papers, even though I doubted that I could combine the prominent Christmas pattern with any other pattern. However, I got lucky in the end. Now, I could give half of my crafting supplies away to the one that makes the perfect guess, but I doubt that I'd have to part with anything. Truth is, the sandy crumbs that I placed onto the card base as well as behind the Christmas carol are just that: sandy crumbs! I found a beach-themed patterned paper that goes perfectly with snowflakes in a  winter night. Who'd have thought!
Once that was done, I added a bit of extra bling by placing a metal star right next to the Nicholas song. I fixated it with a tiny thread which I turned into a ribbon. I cut the ends to random lengths that would hide bits of the text, but I think anything shorter wouldn't give the effect I wanted. 
Overall, I think the recycling project turned out quite nice. I really like the dark, moody theme that emerged - not the typical Christmas atmosphere maybe, but given that it's pitch black before 5 pm, the dark starry sky isn't even that far from the truth.
In the end, I'll show you some hats the snow created on leftover dandelions. They look like little gnomes to me and were such a fun sight on my walk through the winter wonderland.

challenges: 
613 avenue create: ATG with optional twist "any holiday" 
a bit more time to craft: ATG
a place to start: ATG with optional twist "blue Christmas"
cardz4guyz: shades of brown
cards4galz: snow time
crafty calendar: Christmas
crafty catz: ATG
craftyhazelnutschristmaschallenge: ATG as long as it's Christmas
craftyhazelnutspatternedpaper
creative inspirations: Christmas time
everybody art: blue & white
fabnfunky: ATG Christmas
friendship challenge: Christmas
kreativtantenatypical Christmas colours
little red wagon: let it snow
love to craft: ATG 
12 months of Christmas: optional theme "ATG Christmas"
winter wonderland: ATG Christmas

03 December, 2021

Red

Just a quick post and I'll come straight to the point: as the title says, we'd like to see "Red" in your projects over at the Alphabet challenge.
I have created a pretty simple Christmas card this time. 
For the background, I used a rather childish holiday pattern with Santa, snowmen and a reindeer in a winter wonderland. I placed it on a kraft card base and stitched a red swirl to complement the scenery. Once the sewing was done, I placed a couple of pearls and gemstones to make it a bit more interesting. 
I haven't really done any Christmas decorating yet as I believe they shouldn't be put up until mid December, but my little white deer had a short appearance during the photo shoot. 

challenges:  
as you like it: favourite Christmas embellishment (my favourite Christmas embellishment is no different than my favourite everyday embellishment, which is pearls & gemstones. I like how you can add them literally anywhere because they're so subtle, and yet once I place them on my creations it looks like something was missing without them - a bit of bling, a 3D effect, a tiny eye catcher that gives depth to my crafting and brings everything to life)
C.R.A.F.T.: Christmas present
Christmas crafts all year round: something with X/Y/Z (Y for yarn)
crafty catz: ATG 
craftyhazelnutschristmaschallenge: ATG as long as it's Christmas (optional twist "R" - red swirl)
craftyhazelnutspatternedpaper
creative inspirations: Christmas time
creative moments: ATG
fabnfunky: ATG Christmas
friendship challenge: Christmas
intaas: winter
little red wagon: let it snow
love to craft: ATG 
make my monday: cute Christmas
morgans artworld: ATG
my time to craft: stitching real or faux
pennys papertake: ATG
12 months of Christmas: optional theme "ATG Christmas"
winter wonderland: ATG Christmas

26 November, 2021

Christmas countdown

I'm a bit late to post today, so I better come straight to the point. 
I've been invited to prepare a GD project over at Scrapping4 Fun for the current "winter/Christmas" challenge, and this is what I came up with:
The arrangement of 4 golden candles is self-explanatory: I decided to create an Advent wreath, albeit I've chosen a bit of an un-traditional layout. I beaded four strips of a white and gold zig zag using delica beads from my stash. I sewed the ends together in a manner that allows to change the tea candles for the simple reason that I didn't want all the effort go to waste after a single use. 
For the packaging, I was torn between a 2x2 rectangle or a box that would have the candles lined up in a row. As you see, I opted for a rectangular shape in the end - mostly as it would allow me to embellish the box with a stitched star. 
I created the box using scraps of white cardboard and tried to make it as fitting as possible in order to prevent the candles from drifting during transport. Once that was done, I used golden scraps to create a transition between the inside and the outside of the box: I placed stripes of golden paper around the box itself, while I wanted to decorate the lid with a layer of golden background paper.
Since the paper piece was the only one left and it was too small to go from side to side, I decided to improvise by cutting it into four smaller pieces. This way, it would still be visible from behind the star, while the empty space in the middle would be covered up by the golden star.
When everything is packed up, my Advent wreath can be easily transported or even sent by mail due to its small size and weight. Once the candles are taken out of the box, their ornaments can be seen as well. I've been lucky to realize that the pattern fits exactly around the candles without creating awkward gaps, which is a complete coincidence. In a very practical way, the candles can be arranged as pleased without the fear of setting an actual wreath on fire or needing to constantly swipe away the needles that fall off.  
Unlike my usual crafting projects which I create for fun mostly and hide in my stash until further use, this one has already found a new home at my aunt's place. It was a bit of an intentional project to create, since I'm staying with her for a couple of days and she'd usually refuse any payback for her hospitality. That being said, it's an easy one to bring a hand-made "Thank you" in exchange for a place to crash, especially since she's a crafty person herself with all kinds of decorations inside and outside of her house. 

challenges:  
krafty chicks: all occasions
613 avenue create: ATG with optional twist "thankful" 
a bit more time to craft: ATG
basteltraum: gifts/recipes
C.R.A.F.T.: winter
crafters castle: ATG
crafty calendar: ATG
crafty catz: ATG
crafty gals corner: thank you/thankful
crafty sentiments: ATG
craftyhazelnutschristmaschallenge: ATG as long as it's Christmas
creative inspirations: wonderful winter/feeling festive
creative moments: ATG
intaas: winter
love to craft: ATG 
make my monday: cute Christmas
moving along with the times: ATG but a card
my time to craft: stitching real or faux
path of positivity: be grateful
pennys papertake: ATG

19 November, 2021

Quadruple

We're starting a new contest over at the Alphabet challenge, and I think we all agree that the tasks become quite tricky at the end of the alphabet. No need to worry as there's an easy one for Q. It's "quadruple", meaning we'd like to see four of something on your creation. 
I've had quite a few ideas on my mind for my DT inspiration, but I opted for an easy winter/Christmas card in the end. 
The wonderful smile on the photo is from a fashion magazine. I've cut it out a while ago, thinking it might come handy in some of my future projects. On my card, I combined it with a bunch of papers: the brown one with scriptures is from a set of Christmas sheets, the embossed swirls are leftovers from ages ago. From the Christmas set I also took the festive sentiment. However, I decided to remove the green border it used to have and replace it with a scrap piece of brown cardboard. To frame the smile, I picked a dark green paper with polka dots, but my placing of the image turned out to cover the dots on the right side. I'm not sure what to think about it, I cdertainly wish I had those dots all the way around the image. On the other hand, maybe the asymmetry isn't that bad after all?
For the quadruple theme, I punched four snowflakes: I placed the big one on the left side of my card, while the three smaller ones form a group on the right. I decorated each snowflake with a light brown pearl to make it pop, but I see that the smaller ones don't really stand out against the white background.
As this is one of my first festive cards this year, I thought I'd present it in a proper way. I wanted to go to the flower market and see whether they already have some fir branches, and planned to create a layer of green to place my card on. However, I wasn't in the mood to go out into the cold fog, so my new hoya had to step in for the greenery :)

challenges:
creative inspirations: wonderful winter/feeling festive
creative moments: ATG
cutie pie challengeblog: ATG cute
day of the month: beautiful day
do-all kreatives: embossing & frosty times
love to craft: ATG 
morgans artworld: ATG
my time to craft: texture
path of positivity: be grateful
pennys papertake: ATG

05 November, 2021

Patterned paper

Just a quick post from me today as we're starting a new challenge over at the Alphabet challenge blog. We'd like to see "Patterned papers" this fortnight, meaning you can enter any kind of creations again, on the condition that they include some paper fun. 
I went very easy on that one by simply covering an old box of cereal toppings with a lovely rose-patterned paper. I wnated to use this one for quite some time, but I didnt want to use it on a card because I usually tend to cover up the majority of papers I use in card projects. And since I created quite a few cards lately, it had to wait in my paper stash for a non-card project. 
The process of crafting was rather simple: I cut the paper to size and made sure I placed it around the paper box without any major tears and wrinkles. To make sure there's a nice transition where the paper ends meet, I placed a red ribbon over the paper edge. 
For a bit of bling, I used gemstones in different shades of pink. I think they give a bit of bling to the project, and they're also great when it comes to filling the space between the rose buds. 
The box itself is on my kitchen shelf for the moment, filled with leftover cereals. I think I'll eventually use it for cookies, and as such, it might as well become a gift box filled with yummi treats. 

challenges: 
as you like it: favourite circle embellishment (It's definitely gemstones and/or pearls for me, as I can't seem to finish a crafting project without them. I like to add a bit of bling to my creations, and I think those little embellishments are a perfect way to enhance the main motif without taking the attention away from it.)
C.R.A.F.T.: gift bag/box
creative crafty uncles: males go feminine - breast cancer awareness
love to craft: ATG 

27 October, 2021

Christmas mouse

Just a quick post today to introduce the first Christmas card of the season. 
I've been invited to prepare a GD project for the newest challenge over at Penny's papertake. I said yes, but the thing is: I've had this conversation in the beginning of September, and since the challenge was scheduled a few weeks from then, I completely - and I mean totally - forgot about it. Only a couple of weeks later it occured to me that there might be some unfinished project in the back of my mind, and suddenly it dawned on me... Didn't I take on a GD task ages ago? I anxiously checked my inbox, already convinced that I screwed up, because it really has been a long time since I have been in touch with Geesje. 
Sweaty and shaking I finally realized that the due date was yet to come - what a relief! I could have sworn that I've already embarrased myself, and now it turns out I could play it off as "being late". So, I picked one of the digi's I've been offered almost a month ago, but since the challenge was still a couple of weeks away, I put it aside for a bit - and promptly forgot about the challenge once again! What a mess!

Last week, I remembered that unfinished task again, and while checking my inbox again I was now completely sure that I've missed the challenge - only to realize I had, in fact, a few days left. Off to work before I ultimately forget about my due project! And here it is, my twice forgotten GD task featuring this adorable mouse from Digi Doodles. It's a Christmas themed motif obviously, but I decided to use rather untraditional colours. 
The checked background paper has been on my mind for quite some time. I was thinking about creating a card inspired by the pink ribbon, but I can't help thinking that the whole pink October thing is just a way for people and businesses to look good, to gather attetion and revenue. I'm all for awareness and research, but I can't understand what a discount code for a random store will do just because it's printed in pink? It seems to me that the symbol of breast cancer gets abused a lot this way, and therefore, the whole thing just doesn't resonate with me. 
Anyway, as I had the paper at hand, I thought I might as well use it in my Christmas project. At first, I matched it with a couple of other papers to create the general layout of my card. Then, I painted the little mouse with coloured pencils. I mostly kept the pink and grey colour scheme, except for the holly. 
After that, I made one major change to my card plan: originally, I wanted to place a white ribbon on the grey cardboard, but I opted for a sheet of white embossed paper instead. I used a border punch to create an eye catcher on the left part of my card, and printed a simple Christmas wish which I placed on a piece of pink cardboard.
After I glued everything together, I think it doesn't look too bad alltogether. I'm thinking about adding a bit of glitter to the mouse's cap, but I'm not sure whether I should add shimmer or not. I'll be happy to take your thoughts into consideration whether my card is finished enough, or is it still in need of a little something?

challenges:
as you like it: critter or people (definitely critter - I think they're easier to incorporate into my projects because I'm better at colouring animals than people, and I find it easier to match papers/embellishments when I feature an animal, even though I can't really explain why this is happening)
C.R.A.F.T.: non-traditional Christmas colours
cardz4guyz: any animal
crafty catz: ATG with optional twist "add some layers"
crafty sentiments: ATG
craftyhazelnutschristmaschallenge: ATG as long as it's Christmas
craftyhazelnutspatternedpaper
creative crafty uncles: males go feminine
creative moments: ATG
love to craft: ATG 

22 October, 2021

Outdoors

Hello there and welcome to a new challenge over at the Alphabet challenge blog! 
Our theme is "Outdoors" this fortnight, meaning you have a pretty easy task to go with. I'm late with my DT presentation today as we've had some unexpected errands at home, but anyway, here's my work:
As you can see, I went for a bookmark this time. I took one of those slim digis from bugaboo and painted it with regular coloured pencils. Since the brown I've chosen looks rather red-ish, I went with it and searched my stash for matching papers. I opted for a sheet of random zig-zag patterns as well as a sheet of this brown paper that turns out to match the monkey's fur. 
For the back, I used a sheet of light green cardboard which I decorated with another layer of green patterned paper. To finish my project, I used two green ribbons. I cut them to the right length and added a couple of wooden beads on each string before tying it with a knot.
Initially, I wanted to use crimp beads for that, but then I thought they'd looks quite pretty if I just leave them like this. The beads are not fixated meaning they can slide up sand down the ribbon, but since their diameter is rather tiny, they'll not move until you decide to play with them during a reading break. I didn't really plan that, but I think it's a fun twist on the motif of a monkey that is bouncing off a branch somewhere in the jungle.

Not a jungle, but nevertheless - a few impression of Radensko polje as autumn is slowly taking over.

challenges: 
613 avenue create: ATG with optional twist "school daze" 
a bit more time to craft: ATG
a place to start: purely handmade
as you like it: critter or people (I'll almost always go with a critter as I think they're easier to colour that humans because I'm not good with skin and hair. Also, they're easier to incorporate into my crafting projects as I consider animals to be neutral objects, white images of people usually predispose a certain theme by the way humans are depicted doing something, or wearing a certain style of clothing, or... Maybe my crafting just reflects the real world where introvert me would pick almost every animal above almost every human!)
cardz4guyz: any animal
crafty catz: ATG with optional twist "add some layers"
crafty gals corner: Halloween colours
crafty sentiments: ATG
craftyhazelnutspatternedpaper
love to craft: ATG 
love to scrap: ATG but a card
my time to craft: Halloween/fall colours
path of positivity: fall into a book (there's no book like "The Jungle Book" when it comes to jungle animals - even though I honestly remember watching the cartoon more than reading book. But, I'm sure this little monkey will find a friend whom he can guide through many, many stories.)
pennys papertake: ATG
scrapping4fun: ATG

08 October, 2021

No layers

Another fortnight, another challenge. We've arrived at the letter N today over at the Alphabet challenge, meaning I've completed my first full DT turn of the alphabet wheel. I'm hosting the current challenge and will be picking the top projects, too, but first things first: it's "No layers" I'd like to see on your creations. My initial thought was a "Not a card" challenge, but I'm not sure whether there would be enough participants to make it fun as I see card projects entered most of the time. Instead, I made it a challenge without layers. If it is a card, I'm totally fine with it, just make sure to create on your card base itself. If you opt for something else, I truly can't wait to see what you'll come up with.
However, it does not have to be a CAS card. It could be, of course, but maybe you'd like to show me something full of bright colours and patterns? Some doodling? A full-page scenery? Be inspired by the DT projects or create something completely unrelated. Set your fantasy free and I'll be thrilled to see your entries. 
For my DT inspiration, I first thought about creating a non-card project. I have a book of colouring pages I haven't touched yet and the no layers challenge seemed like a good reason to start. However, it all came down to a card in the end. I went through my stash of digis for a suitable motiv, and settled on these wonderful ladies from Dr. Digi's. I printed them on a thick white paper and cut the piece into a size that I would use to create a card base. I then settled on a colour scheme that goes from red to purple - I'm not sure why, but I feel like those rich and heavy colours match the curvy singers. One evening, I put on some music and coloured the motif with coloured pencils. I have to admit I had a bit of a struggle with the hair, but apart from that I think everything turned out quite OK. 
Once the colouring was done, I added a line that resembles the stage. Then, I used sharpening remains of coloured pencils to create the blurry background. 

I then glued a couple of star-shaped gemstones on the card base, and randomly placed a few dots and stars using colouring pencils. I think it adds to the atmosphere full of glitter and an imaginary smoke machine. Also, it covers the fact that I'd usually pick a red/purple background paper at this point, which I obviously couldn't do here. 
After that, I used silver stickers from my stash to create a birthday message. I've deliberately decided to leave a large empty space under the "stage" for the good wishes when I printed the motiv, but I've forgotten to keep in mind the size of the letters. Meaning: I had to realize the birthday note doesn't fit on my card base - a crafter's nightmare. Creating a new card was not an option, so I tried to work my way around my mistake by bending the inscription. I somehow like this effect even more than a "Happy birthday" that's in a straight line, and I truly hope it doesn't give away that it's only an emergency solution!
In the very end, I added a couple more tiny gemstones around the birthday sentiment itself, and voilá: the curvy divas are ready for their performance. 

challenges: 
krafty chicks: stamp act
613 avenue create: ATG
a bit more time to craft: ATG
a place to start: purely handmade
allsorts challengeblog: ATG with optional twist "I love..." (
I love music - there's always a tune in the back of my mind, and when I'm off to an evening in my crafting corner, I'll usually put on a collection that fits my current mood and runs in the background while I'm working on my project. Every now and then, music makes it on the front page of my artwork, too.)
C.R.A.F.T.: ATG
crafty catz: ATG with optional twist "girly"
crafty sentiments: ATG
day of the month: my party day
little red wagon: girls just wanna have fun
love to craft: ATG 
pennys papertake: ATG
scrapping4fun: inspired by an artist 
(I'll go with Ella Fitzgerald this time, and I'm not sure what else I could say - I just love her voice and the perfection of her tunes. I don't always get to incorporate music in my crafts in the form of music sheets or a music-themed artwork, but one of the reasons I fell in love with this digi was that you can literally feel the music it radiates.)