25 March, 2023

Zodiac

Hello and welcome to our last challenge of the alphabet wheel over at the Alphabet challenge blog. Despite the fact that the end of the alphabet comes with a couple of tricky letters, we'll finish it with a theme that should be comfortable to everybody: Zodiac. You may draw your inspiration from the zodiac (i. e. the 12 constellations of the stars), but you could also take the respective signs to create something inspired by stars, animals... I'm sure you'll come up with ways to surprise us!
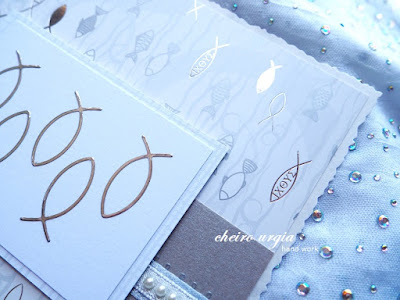
I for myself thought I'd use some actual zodiac signs as I have a nice collection of embroidery patterns that feature (western) zodiac signs. I've used one of them ages ago to use it in a star-inspired card. However, I wasn't sure whether I'd have enough time for the time-consuming paper embroidery. To be on the safer side, I opted for an alternative interpretation of the challenge theme. As the season of confirmations and first communions is coming, I thought I'd use the symbol of a fish to create a simple confirmation card. I had this wonderful fish background in my stash for ages, and decided to finally use it on my card. I like how the colour scheme is kept in silver and white, meaning the final card would be gender neutral. I also like how the background paper will shimmer depending on the light conditions, making the tiny fish come to life. 
Since I absolutely wanted to show this beautiful background, I tried to keep the rest of the card rather simple. I even took a grey marbled card base to begin with, since I thought that a white card would create too much of a border. To break the geometric lines, I used zig-zag  scissors, which helped me turn the straight lines of the cardbase into a wavy edging.
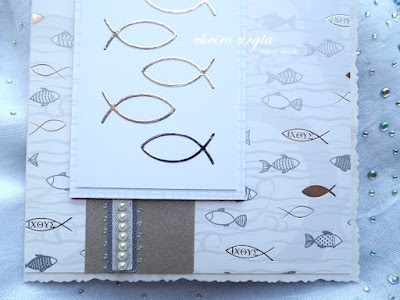
I then took a couple of fish stickers from my sticker stash and placed them onto a piece of white cardboard to create the main motif. Once that was done, I took a strip of shimmering silver paper which I placed over the background paper. I wanted to show as many fish as possible, but I thought that an entire background of fish in addition to the main motif might be too much. The idea was to cover a bit of the background to create a bit of depth and diversity. To prevent the silver strip from being too boring, I blinged it up with two ribbons: For the base, I took a grey piece with tiny loops on the sides, atop of which I placed a plain white ribbon. I then added a row of tiny white pearls for additional bling and a bit of a 3D effect. 
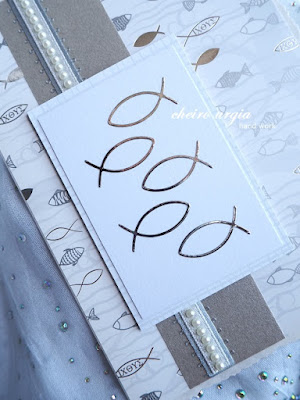
I then looked for ways to merge my main motif into the scenery. In my stash, I found a paper with a subtle check pattern, which fits nicely as it reminds me of a fishing net. It doesn't lock the sticker fish into their white compartment, but rather creates a transition between the white square and the fish pattern in the back. 
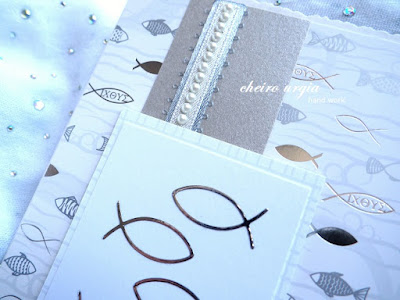
Since the card has no recepient yet, I decided to finish it like it is. Any additional elements such as a dedication will be placed on the inside of the card, as there's enought space there for that purpose, while I feel like the outside doesn't need anything else to be complete. 
challenges:
krafty chicks: all occasions
as you like it: people or critters (Unless I have a really great "people" image or a specific request, I'll always pick critters over people. For one, I'm not very confident with colouring people, always worrying about the hair and skin. Other than that, I'm never sure about how to incorporate people in my crafting projects at all. With animals on the other hand, I feel lots of creative freedom: I use them in main motifs as well as in form of embellishments (bugs, butterflies), and I never get tired of them in general.)
C.R.A.F.T.: ATG
crafty catz: ATG
critter crazy: ATG animals
everybody art: animals/pets
fabnfunky: lots of layers
friendship challenge: ATG
use your stuff: animals

10 March, 2023

Yummy

Can you believe we're having a new challenge over at the Alphabet challenge blog already? I'm not sure where my time is going, but it certainly runs too fast at times! 
Anyway, we're featuring the letter Y this fortnight, and we'd like to see yummy stuff on your creations. Feel free to use any technique you like, and show us whatever "yummy" means to you. As always, it's not required to make a card in order to participate in our challenge, and with that being said, I wonder if we will get to see any culinary creations/recipies? Feel free to surprise us!
For my DT inspiration, I prepared a card. I printed this yummy Bugaboo digi ages ago, but it never made it onto my desk due to other projects. With our current challenge theme, the (birthday) cake seemed more than perfect, so I finally decided to make it shine. I coloured the motif with coloured pencils, working with bright colours to create a feeling of celebration. 
Once I was done, I placed the image onto a piece of beige background paper with swirls that are almost entirely covered up. I then took a bold zig-zag pattern for the main background, which I placed directly onto the card base. 
In the very end, I added a couple of colourful gemstones that could resemble confetti, or even party lights. 

challenges:

25 February, 2023

Love bird

I'm back after a short crafting break (being busy with other things), and it was so great to prepare my DT inspiration for the upcoming Alphabet challenge. The final letters of the alphabet are tricky sometimes, but we have an easy task for you this fortnight: we'd like to see hugs & kisses for the letter X (as in: xoxoxo). As I was digging through my stash, I wondered how to interprete the theme. I found a little piece of a paper album cover, and I decided to cut out the cute bird it featured. I like the combination of peachy tones, and I don't think I've ever created with them, so it was a bit of a challenge for me, too. 
Once I was done cutting the bird motif, I decided to place it onto a kraft background that could be used as a bopokmark or a tag. Before doing so, I used an additional layer of light creme paper, because I thought it would fit better than a sterile white background. After I cut the bird to the right size, I realized I had just enough bird-leftovers to punch two tiny hearts. I placed them atop of the bird, as if it was singing a love song.
On the other side of my tag, I used a white swirly paper. I combined it with a piece of light yellow paper, and placed a strip of tiny white pearls onto the border between the two backgrounds. I decided to leave the embossed swirls as they are, and placed a tiny dedication in the lower part of my tag: nothing special, just a few golden letters saying "For you", and a pair of golden hearts to match the hearts on the other side.
Once that was done, I added a few tiny pearls around the bird, and started looking for a way to complete my tag. I couldn't find anything matching in my ribbon stash, so I decided to take this super long piece of golden thread, and layer it up by folding it multiple times. Then, I created a knot around the tag to hold the "tassles" in place. They're rather long and I like them that way, but I might shorten them a bit when the tag will be placed on a gift. Or maybe I'll just create a massive golden bow? 
When everything was done, I thought I'd add another golden sticker on top of the tag. I didn't want to leave this part of the tag empty, and I thought a bit of gold would create a nice transition between the golden tassles and the bird motif. However, I couldn't find anything suitable in my sticker stash. No golden swirl seemed to fit the way I wanted, until I went through my Christmas stickers, where I finally found a variation of a golden star. I like how it had an opening in the middle, perfect to place it around the opening of the tag. Also, I think since the beams are so close together, it almost makes it look like a sun, rather than a Christmas star. How do you like my solution, and my tag in general? Does it spark a bit of the lovey dovey spring feeling, or are you still buried in winter wonderland?

challenges: 
krafty chicks: all occasions
crafty catz: ATG
crafty gals corner: add a heart
critter crazy: ATG animals
fabnfunky: for a child
kreativtanten: bookmark
make my monday: all creatures great and small
nachteulen: ATG

27 January, 2023

Vellum

I'm a bit late to introduce the latest Alphabet challenge this time, so I'll get straight to the point: our theme for the letter V is vellum. I'm not usually working with vellum/parchment paper, so I thought it would be quite a challenge for me to create comething that should inspire you to play along in our alphabet wheel. However, I found a beautiful sheet of vellum I bought recently: a piece embellished with mandala-like patterns, which fits perfectly for a quick & easy "just because" card. 
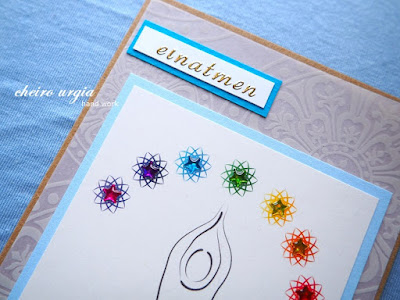
You might be familiar with the motif as I'v eused it before, cutting it from a leaflet I received during rehabilitation. Since I liked it so much initially, I made sure to collect a few of the leaflets in which I found it so that I'll be able to use it in different projects. This time, for example, I decided to pay more attention to the surroundings. I picked a kraft card base which would make the vellum background stand out nicely. Then, I cut the meditating figurine to the right size, placing it onto a piece of light blue cardboard. After that, I placed it in the middle of my card. Then, I added a couple of shimmering star stickers to where rainbow ornaments of the image are. 
To make the image appear bigger, I then added the words "breathe in" and "breathe out" which I've created by using golden stickers (I didn't want to run the printer for just two words, and I need to reduce my sticker stash anyway). I think they aling nicely with the shimmering stars, especially when the light falls onto the card under a certain angle.
Once that was done, I took two little pieces of blue cardboard from my stash of paper snippets, and placed them in the upper resp. lower corner of my card. On the one hand, this gave me the opportunity to enlarge the main motif, but most importantly, it gave me the opportunity to place a bit of adhesive behind said strips. One of the things I dislike about vellum is the fact that every kind of glue will shine through, but placing something on top of the vellum sheet turned out to be a handy solution for the problem.
Anyway, I hope you like my little creation, and I'm looking forward to seeing your vellum-inspired projects in our link-up soon.

challenges:
krafty chicks: all occasions
crafty calendar: add a sentiment
crafty catz: ATG
creative crafty uncles: happy birthday
creative inspirations: something old, something new (new: vellum sheet, old: image)
cutie pie challengeblog: January blues
everybody art: new (vellum sheet)
love to craft: ATG 
make my monday: favourite 2022 challenge (July 18th: Outdoor sports)

13 January, 2023

Get well soon

We've fully started into the new year by now (and passed the first half of January already!), but our tasks over at the Alphabet challenge blog are approaching the end of the Alphabet. For the letter U, our theme is "Under the weather", meaning that we'd like to see your "Get well soon" creations this fortnight. Remember, it doesn't need to be a card - just make sure your project is meant to lift someone up and bring a little cheer.
For my DT task, I've chosen a very simple outline using paper scraps from my stash. One reason is that I'm really busy right now finishing tasks that should have been done long ago, and the other... Well, you can never use up enough scraps to bring order in your crafting stash. That being said, I took a strip of patterned paper with different kinds of foliage. What looks like a neatly picked image is actually part of the cardboard box of a fragrance I once bought. It seemed too pretty to be thrown away, which is why I cut it in a way that would not include any labels. The rectangle that I managed to save ended in my scrap drawer until recently. I figured I'd use it as the main focus of my card, which is why I opted for a plain green background paper. I cut that one into a similar size than the piece of greenery to leave lots of blank space, and overlapped the papers to create some sort of depth. For additional texture, the green paper I worked with has a subtile embossed pattern on it. 
I complemented the card with a tiny "Get well" message which I placed on another piece of green paper. Once that was done, I couldn't resist adding a couple of gemstones and pearls that I got myself for Christmas. While the pearls create a nice 3D effect by blending into the floral pattern, the shiny gemstones add a bit of bling, which I feel makes the card complete.

challenges:
as you like it: favourite reason to send a card (I like to send/give away "Just because" cards, because I mostly create cards without a special reason. I believe that an unexpected gift will bring joy to the recipient, and make their day a little brighter. That bein said, I consider most of my cards as "Get well" cards, as the'll improve the mood of the recipient even though the person receiving the card might not be actually sick and/injured.)
C.R.A.F.T.: new (new gemstones)
crafty calendar: add a sentiment
crafty catz: ATG
creative inspirations: something old, something new (old piece of patterbed paper, new gemstones)
love to craft: ATG 
make my monday: something new (new gemstones)
nachteulen: ATG

01 January, 2023

I will draw


Я намалюю на папері щасливу дитину,
Де в мирному небі літають птахи.
Я намалюю на папері рідну Україну
Без війни.

Я намалюю на папері нашу тишу,
Я намалюю на папері наші зорі,
Я намалюю все, що нам з тобою так потрібно.
Будь поруч, будь поруч!

Я багато можу намалювати,
Але мрія у нас всіх одна:
Щоб закінчилась страшна і люта
Жахлива війна!

Я намалюю на папері щасливу дитину,
Де в мирному небі літають птахи.
Я намалюю на папері рідну Україну
Без горя, без печалі, без смерті, без війни!
     
Я намалюю на папері щасливу дитину,
Де в мирному небі літають птахи.
Я намалюю на папері рідну Україну
Без біди.

Ти вся у ранах, так пече і дуже страшно.
Не бійся, ненько. Ми - твої захисники.
Усе життя було з тобою нам так класно,
Тебе ніколи не залишимо в біді.

Бо одна в нас така Україна
І за тебе горою ми всі
Я намалюю, щоби ти була щаслива
Навіки.

Я намалюю на папері щасливу дитину,
Де в мирному небі літають птахи.
Я намалюю на папері рідну Україну
Без війни.
     
Я намалюю на папері щасливу дитину,
Де в мирному небі літають птахи.
Я намалюю на папері рідну Україну
Без горя, без печалі, без смерті, без біди!
     
Я намалюю на папері щасливу дитину,
Де в мирному небі літають птахи.
Я намалюю на папері рідну Україну
Без війни!

Діма Волканов, Намалюю 


---

I will draw a happy child on paper,
Where birds fly in the peaceful sky.
I will draw my native Ukraine on paper
Without war.

I will draw our silence on paper,
I will draw our stars on paper,
I will draw everything that you and I need so much.
Be there, be there!

I can draw a lot,
But we all have the same dream:
To end the terrible and wicked
Horrible war.

I will draw a happy child on paper,
Where birds fly in the peaceful sky.
I will draw my native Ukraine on paper
Without grief, without sorrow, without death, without war!
     
I will draw a happy child on paper,
Where birds fly in the peaceful sky.
I will draw my native Ukraine on paper
Without troubles.

You are covered in wounds, it burns so much and it is very scary.
Don't be afraid, baby. We - are your defenders.
Our whole life was so great with you,
We will never leave you in distress.

Because we have only one Ukraine,
And we are all rooting for you.
I will draw to make you happy
Forever.

I will draw a happy child on paper,
Where birds fly in the peaceful sky.
I will draw my native Ukraine on paper
Without war.
     
I will draw a happy child on paper,
Where birds fly in the peaceful sky.
I will draw my native Ukraine on paper
Without grief, without sorrow, without death, without troubles!
     
I will draw a happy child on paper,
Where birds fly in the peaceful sky.
I will draw my native Ukraine on paper
Without war.

Dima Volkanov, I will draw

30 December, 2022

Thank you

Hello and welcome to what will probably be my last post of the year. We're having a new challenge over at the Alphabet challenge blog, and our theme this fortnight is "Thank you". I think it's a fantastic match for the tradition of drawing the balance at the end of the year, and I hope that when you look back at 2022, you can find many things to be thankful for. 

I for myself have the feeling that this year has flown by like no other. I managed to make some progress in certain areas, but I feel like I'm forever stuck in others, and since I'm still not able to catch up with my life, it's more like going from one day to another without a knowing what will be around the corner. And I see that while not making plans is a wonderful fantasy when it comes to holidays or a limited time off, not being able to plan things can be quite disturbing in everyday life when you simply don't know how you're going to feel two days from now. 
Anyway, while I'm still far from any predictable routine, I try to keep myself busy with smaller tasks like crafting. Being on a DT certainly helps as you "have" to produce something every now and then, and for my "Thank you" project, I had indeed planned out everything. I didn't have the final concept of what I'd like to do, but I had a couple of ideas and I thought I'd just sit down and see which one attracts me most. The problem being: I kind of missed my crafting day. See, I was certain that I had another day to go in the week after Christmas, and this day would be my day to get crafty. However, when I awoke to what I thought would be my crafting day, I realized that I'd have to upload my DT project within a couple of hours. Where did the time go, and how I could spend the entire week thinking I'd still have a day to spare - I have no idea! 
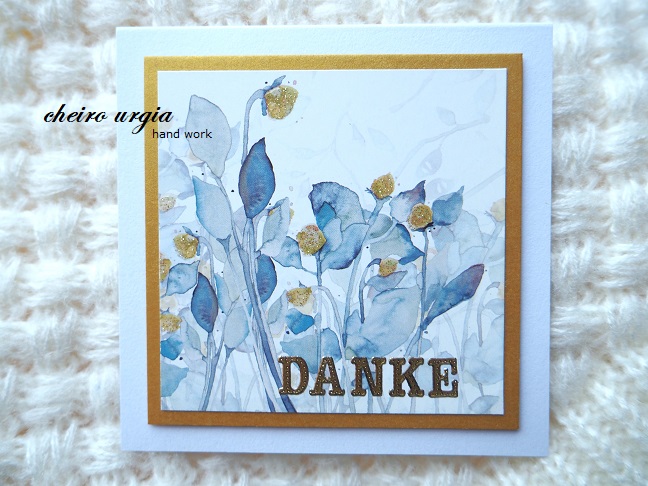
What I knew was that my best option was checking if I can find some unfinished projects in my stash. Otherwise, I'd just have to admit defeat and skip the challenge. Luckily, I found this half-finished mini card in my project pile: I have cut the image of golden blooms ages ago from an album cover, and I decided to glue it onto a golden background paper for a bit more bling. I then used 3D adhesive pads to place everything on one of those 9 x 9 cm card bases that are suitable to add to a bouquet or a chocolate box. Once that was done, the half-finished card ended up in my stash. 
With the time running out, I've re-discovered this tiny card, and I decided to bring it to life. I didn't want to print a "Thank you" sentiment because I thought another layer of paper would take attention away from the golden blooms. Instead, I created a single word of thanks by placing golden stickers directly onto the card. They are a nice match to the golden elementst of my card, however, due to bad lighting conditions the photos don't do them justice. I hope you still have an idea of how the card looks in real life: bright, white, with green watercolour-like foliage and golden accents.