Shall we start another Scrapping4Fun challenge? Matching the season, we have an "autumn" theme this time, with an additional request of make your creation look vintage.
For my GD task this time, I decided to create a card or a tag in brown-ish colours. However, the "vintage" thing bothered me a little as I'm usually not working on vintage projects. My confusion was once again saved by the Graphics Fairy, where I found a beautiful image of mushrooms.
Once I settled for an autumn card, I went through my stash to grab the matching papers.
It took me quite some time to pick the right ones, and even longer to arrange them properly, and just when this ordeal was done, another one began: which embellishments should I pick to keep and/or enhance the vintage look without shifting focus away from those amazing mushrooms?
In the end, I went with a couple of cream/brown paper flowers alongside with some paper foliage from the collection of autumn papers created by Nina Štajner which I've purchased recently. I've cut the branches from the paper for no reason whatsoever, and it came pretty handily as I didn't have to cut them now, meaning I could work towards my final result without rushing. After playing around with the layout a little bit, I decided to place a bigger piece of greenery in the lower corner of the card...
... and a smaller branch in the upper right corner.
And while the upper decor is rather flat except for the flowers...
... I layered the leaves with the help of 3D pads to create a vivid eye-catcher.
As I intend to use my creation as a birthday card for a gentleman, I placed a short birthday greeting on the base of the vintage print, which I again decorated with a small floral element.
For some more vintage touch, I added a rather broad lace that runs through the entire length of the card but is mostly covered by the paper arrangement. Once everything was done, I placed pearls of different colours and sizes all over the card for some extra bling.
To make sure the one leftover corner wouldn't remain all too empty, I remembered a vintage butterfly print I had in my stash from some previous project.
However, as I printed it at home, it lacked the glossy shine of the leaves that were in the rest of the card. Being the horrible perfectionist that I am, I tried to imitate the shine by adding colourless nail polish. It didn't bring the desired result at first, but after adding a couple more layers I couldn't tell the difference between home and bought print.
To be totally honest, the piece carried the distinct smell of nail polish for a while, but it completely cleared within a day or two and I will certainly use this random life craft hack in future!
Before I sign off for the day, just a quick peek to the inside: with the rich outside, I decided to go for a little decoration inside as well rather than leaving everything empty. In the end, I picked a light brown paper from another set of autumn papers and placed a punched beige strip atop of it to create a pocket for the birthday wishes.
A little contribution to the September collection of Create in Austria - artwork created by Austrians and/or in Austria.
challenges:
- 613 avenue create: ATG
- a bit more time to craft: ATG
- a place to start: ATG
- allsorts challengeblog: trees and leaves
- basteltraum: autumn
- brown sugar: ATG
- cardz4guyz: treea/leaves
- crafting with an attitude: ATG
- crafty calendar: lots of layers
- crafty gals corner: fall colours
- crafty sentiments: ATG
- creative inspirations: lace & pearls
- creative moments: ATG with optional twist "masculine"
- cute card thursday: dies/punches
- cutie pie challengeblog: celebrations
- everybody art: dies
- little red wagon: fall
- love to craft: ATG
- morgans artworld: ATG
- pennys papertake: ATG
- male room: embellishments
- through the craftroom door: ATG
- unicorn challengeblog: autumn
- wortartwednesday: ATG
- pinspirational
- worldwide open design team challenge: ATG
Just a quick post to show one of my latest projects, as well as trying to catch the deadline over at craft-alnica.
The vague beginnings of what I had in mind might have started during my stay in Munich ages ago, upon discovering my favourite brand of granola. I carried several of their super cute tubular boxes home only to discover that they have a branch nearby, which - needless to say - made my future granola shopping so much easier (except for the part of deciding which flavour to pick). And about the same time, it crossed my mind that I might as well use the empty containers in my crafting projects. However, once a box was done, I'd usually get rid of it due to lack of time and/or ideas.
Finally, I decided to see how one would look wrapped in simple wrapping paper. The paper itself is from my stash and fits the season with its vintage sunflower print. Also, I thought it might fit the culinary theme as well since I planned to use the transformed box for storing spaghetti in my kitchen.
As you can imagine, it took me some time to find the perfect part of paper to cut out and to arrange it in a way that would properly cover the edges of the tube. Before that, however, I decided to place a layer of plain white paper onto the original box. What seems inconvenient at first had a very practical purpose: matching the different granola flavours, the fruity grain mixes come in different colourful containers and as this particular one had a rather dark pattern, I thought it might shine through the thin wrapping paper and disturb the sunflower images.
With the additional layer of white, the anticipated problem was no longer an issue and I could finally get to the part of gluing the huge paper piece on tubular surface. I gave the container a quick rinse and made sure it's completely dry, and carefully removed its bottom to make sure I'd get a good grip when working on the wrapping.
Still, that was the part that scared me most as I usually manage to create a wrinkle here and a tear there, but everything went surprisingly smooth this time.
Once everything was in place, I decided to add the remainder of a floral ribbon to hide the edges of the wrapping paper. It might have been an unnecessary addition in the hindsight, but I felt like the container needs something more than just wrapping paper to look pretty :)
On a close look, there's still a small wrinkled area in a part which I used to try liquid glue. I thought it would be a good alternative to adhesive tape, but as it turned out to crimp the white paper underneath, I thought I'd better let it be, figuring the effect on much thinner wrapping paper would be even worse. Back to adhesive tape, I managed to go without any gluing issues and would only pick the adhesive glue to secure the bottom lid back onto the granola spaghetti box.


After that, I'd let the box est for a couple of days to get rid of the glue smell, only to meet an unexpected problem: since I was focused on spaghetti storage from the beginning, I thought it was quite funny to find out that once the entire box of spaghetti is stored, the pasta stands upright in a way that makes it impossible to close the lid. Turns out the box is a couple of millimeters too short to store them properly! After a lunch or two, however, and less pasta in the container, the remaining spaghetti will create a spiral and resolve the issue.
Not a real problem after all, but certainly something that never occured to me beforehand, especially since the quick comparison of boxes didn't indicate anything could go wrong. But then again, I think I just didn't consider that the lid and bottom are faced inwards, meaning they both use up space of the actual container and I somehow completely forgot to take that into account.
One done, one almost empty, and another set of boxes that must arrive at my place any day soon.
A little contribution to the September collection of Create in Austria - artwork created by Austrians and/or in Austria.
challenges:
- krafty chicks: ATG
- 613 avenue create: ATG
- a bit more time to craft: ATG
- a place to start: ATG
- C.R.A.F.T.: autumn
- craft-alnica: recycling
- crafting with an attitude: ATG
- crafty catz: ATG
- crafty gals corner: fall colours
- crafty sentiments: ATG
- craftyhazelnutspatternedpaper
- creative moments: ATG
- love to craft: ATG
- pennys papertake: ATG
- scrapping4fun: ATG
- through the craftroom door: ATG
- tuesday throwdown: ATG
- unicorn challengeblog: autumn
- use your stuff: upcyce/recycle
- wortartwednesday: ATG
- worldwide open design team challenge: ATG
With September in town and a major drop in temperature on the way, the quick post today will announce the start of our newest challenge over at the Fadengrafik Challenge before fall finally kicks in. We're having a "mushroom" theme this month, and it turned out to be quite a challenge for me to be honest.
For a moment, I thought about using a mushroom pattern from my stash that I've turned into a card ages ago already, but then again, I didn't want to just reproduce something I've already done. Instead, I decided to use a simple geometric pattern that I have used probably a dozen times, in different colours and combinations. Oh well...
To make it worse, I decided to create a bookmark rather than making a card - which, too, is a something I have already done a dozen times using this particular pattern.
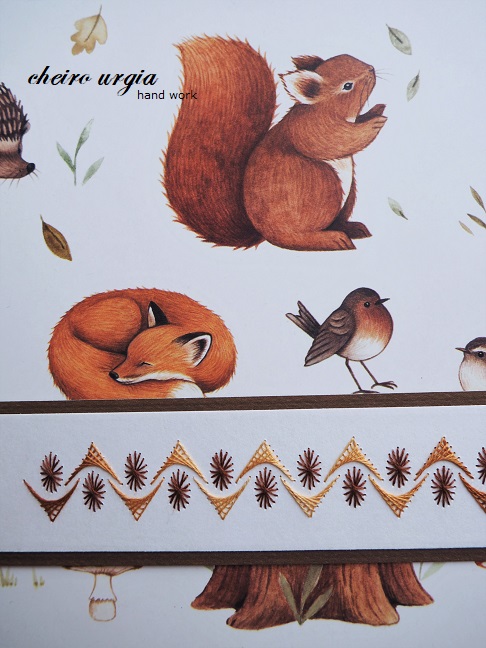
But then again, I've never used this particular combination of brown yarns (only a really, really similar one, lol!). Anyway, after the stitching was done I enhanced the white paper using dark brown cardboard, while I began to go through my stash looking for a matching piece to cover the other side.
Overall, the brown-ish colours of my project are visibly inspired by the beautiful paper collection by Nina Štajner which I recently purchased after going back and forth about it for quite a while. The lovely autumn critters are simply adorable, and so are the patterns she in her paper collection, but how could I possibly use them in my crafting projects when they're just too beautiful to be cut, folded, glued, and/or covered? In the end, I simply *had* to have them.
As there was no mushroom in my stitched motif, I now began to search the paper set looking for a fitting mushroom piece: preferable a rather tiny pattern that would cover the back of my bookmark and resemble the real-life situation of a mushroom picker in the forest: they might not be there in plain sight, but if you keep looking, you might eventually find them along the way.


Make sure to follow the official regulations though, which will very likely be no more than 2 kg per person per day, which should be more than enough for any normal individual. By no means do it the "Slovenian way" which will include forest raids with a daily prey of 50+ kg, proud photo evidence of piled up mushrooms and bragging about one's "success" to just about everybody without even thinking that no person in their right mind can process this amount of fungi, especially as this is most likely not a once-a-year lucky find. Take approximately as much as you can/will eat til the next season and leave the rest to grow and/or rot, for heaven's sake!
A little contribution to the September collection of Create in Austria - artwork created by Austrians and/or in Austria.
A little contribution to the collection of hand-stitching at made with Blümchen.
challenges:
- 613 avenue create: ATG
- a bit more time to craft: ATG
- brown sugar: ATG
- C.R.A.F.T.: back to school
- craftyhazelnutspatternedpaper
- creative inspirations: something seasonal (fall)
- creative moments: ATG
- cute card thursday: ATG but a card
- love to craft: ATG
- pennys papertake: ATG
- sketchy challenges: ATG
- through the craftroom door: ATG
- use your stuff: back to school
- wortartwednesday: ATG
- pinspirational
- worldwide open design team challenge: ATG