18 June, 2021

Furry friends

We're having a new challenge over at our alphabet carousell, and we'd like to see "Furry friends" on your creations this fortnight. Show us your critters, big or small! 
I had a number of ideas for my DT task, but I settled on a transformation in the end. I took an old book that I got myself from an antique shop years ago for the purpose of using the old pages in some of my crafting projects. I was looking specifically for tattered vintage-looking pages in a language I don't speak, as it wouldn't cause me headache if my crafting theme interferred with the text in the background. In fact, I found an old French book that matched my idea. However, I never really went to work, meaning it remained untouched and ready to be used now in a completely different project. 
Namely, I decided to wrap it up in some pretty papers to create a fake book, probably to be used as a spring/Easter decoration. 
For the base, I used a dark brown cardboard, which I layered up with things that came to my mind. One of the first things I picked was this cute bunny among flowers by Nina Štajner. It's actually from a cover of Nina's paper album, but I found it too beautiful to be thrown away. 
For the upper layers, I wanted to play with Nina Štajner papers, too, but I just couldn't decide on "the one" among all the beauties in my stash. I almost picked a pattern of tiny leafs for the entire cover of the book, which would give an autumn-ish look, but it didn't quite match with the rabbit image. However, as I flipped the paper around, I discovered this wonderful forest scene on the other side. You might remember it from the woodland challenge, but I just couldn't not use it again :) I placed a polka dot paper under it, which is barely visible but still created a transit between the patterned paper and the dark background.
With the back side done, I began focusing on the front cover. I thought the forest background would be a bit too busy, so I opted for a piece of doily and the brown polka dot paper. To fill the blank brown space I intended to use pearls of different colours and sizes. 
While one side of the "book" is lined by the shabby pages, I embellished the spine with a vintage heart ribbon from my stash. 
Back to the front page, I added a small spring-themed sentiment to complete the centerpiece. 
Once the motif was glued onto the book cover, I began adding the pearls. I stuck to brown and beige shades mostly, with a bit of green and white inbetween. 
As the upper part seemed a bit empty, I originally thought about adding another sentiment, but I didn't want the message to interfere with my main motif. I opted for two floral pieces from my wood stash instead. I only planned one central pearl for each bloom, but then the little ones on the big blossom just popped up out of nowhere :)
And to round up your task, a little furry bundle hiding from the summer heat. 

challenges: 
as you like it: favourite crafting tip (my tip would be to always look in your stash, or at least have an idea what is there - I managed to get to use some wooden flowers that have been in my stash for years (literally!), and I wouldn't even know I had them if it wasn't for an occasional check through my drawers. On the other hand, a stash with no overview will result in your stuff accumulating and you not using it because you just don't know it's there - a guarantee for desaster.)
basteltraum: animals
crafty catz: ATG with optional twist "animals"
crafty sentiments: ATG
craftyhazelnutspatternedpaper
creative inspirations: spring
creative moments: ATG
cute card thursday: ATG with optional twist "critters"
do-all kreatives: small & tall
everybody art: bingo (flowers, pearls, ribbon)
fabnfunky: for a child
little red wagon: bits
love to craft: ATG 
make my monday: outdoor fun
morgans artworld: ATG
pennys papertake: ATG
scrapping4fun: ATG with an animal

02 June, 2021

At it again

I haven't been able to contribute to the Fadengrafik Challenge lately as the pricking and stitching takes quite some time, and I just didn't seem to be able to slow down enough for a project like this. After having skipped a couple of DT tasks in the past months, however, my guilty conscience made me get crafty over the weekend. I took this month's pattern and started to plan my first pick-point card in a while. 

I thought I'd duplicate the embroidered border on a sheet of white cardboard, and place it on the top resp. the bottom of my card while using a digi as the focal point. I picked this cute little Bugaboo monster from my stash of pre-printed images. All I needed to do was cut it to the right size. With the rose, I was leaning towards using red as my main colour, meaning I picked a red background paper and a piece of patterned paper with hearts that would enhance the digi itself. The hearts aren't as visible as in my recent anniversary card, but I think they still set the tone for the card in the making. 
To get a break from pricking, I coloured the guy first with coloured pencils and glued the image onto the background paper. Only afterwards, I opened my box of yarns to find some matching threads for the stitched pattern. 
Since I felt like there's quite a lot of red in the card already, I opted for grey and silver yarns, with the exception of the middle swirl. Also, I think the grey shades match with the grey I used in the digi. I used metallic yarns for a bit of bling and added a few extra pearls/gems to make the embroidered pattern pop. 
Still, something didn't feel quite right. I'm not sure why, but I just didn't like the outcome. The digi was fine, and so where the swirls in the top and bottom part of my card, but it just didn't work for me. Something was off and I couldn't point at it, no matter what. On the other hand, I didn't want to create a new centerpiece, or stitch the pattern again in a different colour. (And honestly, I wouldn't have time for it either, meaning I'd have to skip yet another DT task.)
In a moment of frustration, I flipped the card in a 90 degree angle. And suddenly, the monster seemed to have enough space to breathe. I guess the height of the image came just too close to the stitched patterns as long as I had the card standing vertically. Once the card was in horizontal position, the digi had enough space in all directions, which I think took away all the tension in my creation. Who would have thought that such a small change can make such a difference?
A little contribution to the collection of hand-stitching at made with Blümchen.

challenges: 
krafty chicks: all occasions

21 May, 2021

Dragons or dinosaurs

Please don't ask me what I was thinking when I picked "Dragons or dinosaurs" as the task for the current Alphabet challenge, because I honestly have no idea. 
Looking back, I thought it would be nice if I could challenge myself with a masculine dragon card. As I expected this specific theme could be a challenge to many of you, I decided to add the dinosaur-option to make it a bit easier. However, once the theme was set, I just couldn't find the proper masculine dragon digi. 
Next on my list was this fantastic TP dragon freebie - however, the whole toilet paper hoarding thing is almost forgotten by now and I couldn't wrap my head around this image either. I began to lean towards a fun project for kids featuring a cute little dragon, but it didn't really resonate with me either. 
For the record: yes, it was me who has chosen the dragon theme. And yes, I had no idea what to do. Time for an emergency exit!

In my despair I began to explore dinosaurs. Again, I began looking for digis and stuff in my stash. I found a cute scrapbook paper featuring dinosaurs, which would be a perfect match for a children's birthday card. But somehow, I didn't feel like creating a card. As I searched some more, I remembered a specific napkin I had: a pair of dinosaurs in a desert-like scenery. 
Slowly but surely, things began to fall into place: mom has saved some flower pots from the trash recently, and I have already reserved some for my plants. However, I didn't like the colours and planned to upcycle them some time in future. As I needed to come up with a dinosaur project soon, I figured I might as well use some napkin decoupage on one of the pots.
I covered the weird mud-yellow base with several layers of white acryllic paint, and cut the motifs from the napkin: a pair of dinosaurs, as well as some cacti and stones. Once I decided on where to place the cut-outs, I glued them on the pot using a mat varnish. 
Naturally, I made sure to seal the most important motif first, meaning I created a rather ughly tear in one of the dino's comb before I realized it was one of those napkins that are especially nasty to work with: super thin stuff that is ripping at every opportunity. Not to mention the wrinkles!
Nevertheless, I managed to decorate the pot without further accidents, leaving the varnish to dry overnight. Next day, I added a couple more layers to make sure the decoupage will sustain scratches and else. 
And somehow, I think my little Yucca palm fits quite well to the world of dinosaurs. 

challenges:
krafty chicks: CAS
classicdesignchallenge: ATG DT
craft-alnica: animals
crafty calendar: masculine
crafty catz: ATG with optional twist "cute as you like"
crafty sentiments: ATG
friendship challenge: wild animals
love to craft: ATG 
path of positivity: change your environment (I'm changing my micro-environment currently by adding plants to my apartment. It's not that bad yet, but I think we can talk about "more than the average number" of plants here. As I still try to present them in an orderly manner, I find myself looking for pots, swapping pots or creating "new" pots by upcycling old ones - which again is a change for the actual environment as usable things don't end up at the landfill.)

07 May, 2021

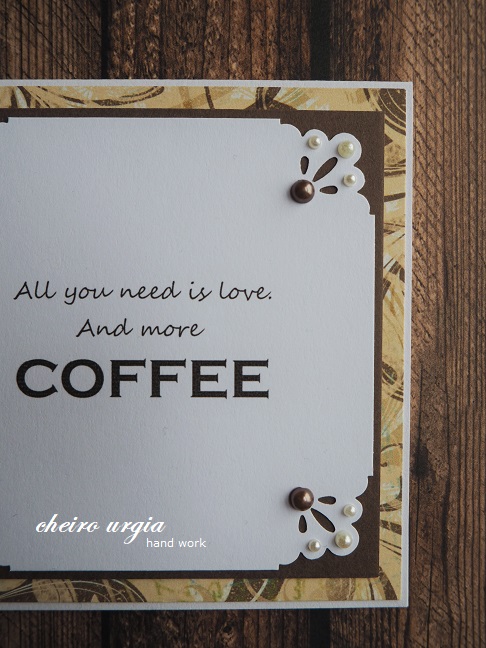
Chocolate or coffee

Chocolate or coffee? What seems to be an existential question to many, is the title of our task at the Alphabet challenge this fortnight. I don't consume any of the above in huge amounts, and while I do enjoy chocolate here and there, I never really got used to coffee. At all. Ever. 
I guess I'm an atypical med student here, as the brown magic never kept me awake before exams: I could drink a cup and go straight to bed. Needless to say, I didn't stick with something that doesn't seem to work for me. I have my cappucchino every now and then, but it's mostly for occasions when I'd like to have something warm and sweet - and the amount of sugar I'd add makes my coffe-loving sister roll her eyes in disbelief (and probably in disgust, too).

Anyway, I wanted to create an elaborate card for my DT inspiration, one that would include some sort of chocolate cake with lace and pearls and papers in different shades of brown. But since I had little time to prepare the project, I turned out to be something very different in the end. 
To make it quick, I decided to work around a focal sentiment. I've opted for a coffe-themed one as I think it will be a short note for my sister eventually. I printed it on white cardboard, and placed it on two kinds of background paper: one with a brown-ish swirls, and a plain brown one. 
The cardbase is one of those mini-cards that don't leave much room for embellishments. Still, I decided to add a bit of an eye-catcher by using an edge punch and a couple of pearls. 

challenges: 

23 April, 2021

Chuck chuck, good luck

It's another Friday, and we have a new task over at the Alphabet challenge for you: show us your feathered creatures, because we're looking forward to seeing "birds" this fortnight. I've created a rather simple masculine card for my DT inspiration, featuring a busy woodpecker.
The photo is from an old calendar, I've once cut it to size and enhanced it with a layer of white cardboard. However, I didn't quite figure out how to use it, so it eventually disappeared in my stash. Now, I cut away the white border and opted for a black background instead. I then took this wonderful wooden background paper which I've purchased a couple of years ago in Pardubice. Why Pardubice? Because I love the Czech Republic and Prague in particular, but I also like to explore new places and the city was recommended in one of the Honest Guide episodes. 
After spending a beautiful summer day there with my sister, a shop for crafting supplies has caught my eyes, and long story short: when we returned to Prague, my bag contained not only gingerbread the city is famous for, but also a bunch of colourful papers and other crafting supplies. Also, I now know that "crafting supplies" means "výtvarné potřeby" in Czech, which makes looking for this kind of stuff so much easier :) 
Anyways, once the diligent woodpecker found its home among tons and tons of wood, I still felt like something was missing. Due to the prominent background pattern I found it hard to add a suitable embellishment, but in the end I opted for another thing from my stash. 
I remembered my box of half-finished decorations, which among others hides a couple of stickers that are placed on colourful cardboard, and are waiting to be used some day. 
I picked a red cardboard triangle with a golden sticker on it, and it seemed perfect for some extra bling on the card. However, I decided to partially cover it up in order to keep the main focus on the bird. And suddenly, I didn't feel like changing anything else on my project.

challenges: 
krafty chicks: all occasions
C.R.A.F.T.: recycled (old calendar)
crafty catz: ATG with optional twist "all creatures great and small"
creative crafty uncles: fathers day (masculine)
creative moments: ATG
love to craft: ATG 

09 April, 2021

Anniversary

It sounds like a cliche, but boy does time fly! We've barely finished the "Z" task over at the Alphabet challenge, and already we start all over again with the letter "A", meaning we'd like to see your "anniversary" themed creations this fortnight. 
For my DT inspiration, I contemplated the usual anniversary things like hearts and swans and rings, or silver/gold for certain jubilees, but I have no specific events coming up anywhere near me, so I decided to create a rather generic love/anniversary card. 
And for this occasion, I'd like to introduce the newest addition to my stash: a cute little gnome I've received from SheepSkiDesigns just last week. The forget-me-not indicates rememberance, and seemed suitable for the challenge theme (I hope!).
After settling for the motif, I went through my stash looking for a suitable cardbase and background paper. I opted for a red tri-fold card, which results in a design that might remind you of my recent Easter card. Still, I tried to create something that wouldn't be  the exact copy of the bunny project. 
The digi itself is coloured with coloured pencils as usual. However, I only painted it after I've picked everything else for the card - a rather unusual sequence of events as I'll normally finish the main motif first, and only later search my stash for things that might go with it. 
The heart-themed pattern in the background seemed a nice addition to the red card base, and the love theme in general. However, I can't help thinking it distracts the attention from the main motif. Maybe I should stick to the "motif first" thing in future?
In the end, I lined the image with a silver sticker, but it just didn't seem to work for me. After sleeping it over, I replaced the border with a string of tiny white pearls, which seem to fit much better with the overall design. Also, I decided to add a sentiment which could be translated with something along the lines of "still forever". 

26 March, 2021

Zoology

We're heading into a new two-week task over at the Alphabet challenge, finishing the alphabet with the letter Z. That being said, we'd like to see your "zoology" inspired creations.
I for myself decided to work with napkin decoupage this time, creating small decorative objects like the ones I've made a while ago. Unlike the floral pieces, however, I used the motif of ladybugs.
I cut them from a handkerchief and placed them randomly onto a couple of wooden discs.
On the front, the wood is painted with white acrylic paint, which makes the bugs standing out nicely. On the back side, I used a vibrant red colour, but it didn't occur to me to turn the pieces around during the photo-shoot on Wednesday, and I didn't have the time (or the mood) to take them out again yesterday. Ooops!
I'm not sure about the use of the discs to be honest. I might try to turn them into some kind of Easter/spring decoration, or maybe place a magnet on the back side to turn them into fridge magnets? Or just keep them as they are - some kind of lucky charms?

challenges:
krafty chicks: all occasions
613 avenue create: ATG
a bit more time to craft: ATG
a place to startpick a shape (circle)
as you like it: favourite springtime critter (I've chosen ladybugs for this one, because they're one of the first animals buzzing around when the days become warmer. It might not be a common pick among all the bunnies, but Easter can be quite late in spring sometimes, plus I've never really seen a bunny/hare out in the wild. Ladybugs are more "tangible" to me, and the sighting of the first ladybug is a spring-milestone every year.)
C.R.A.F.T.: spring/Easter
love to craft: ATG